|
|
|
|
|
|
|
The
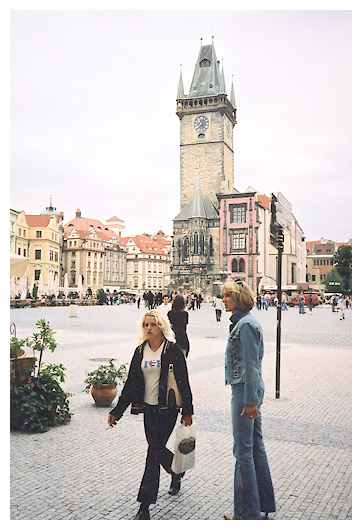
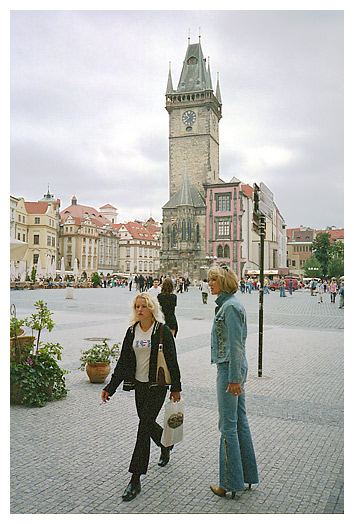
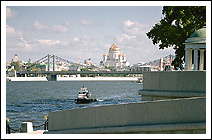
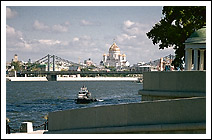
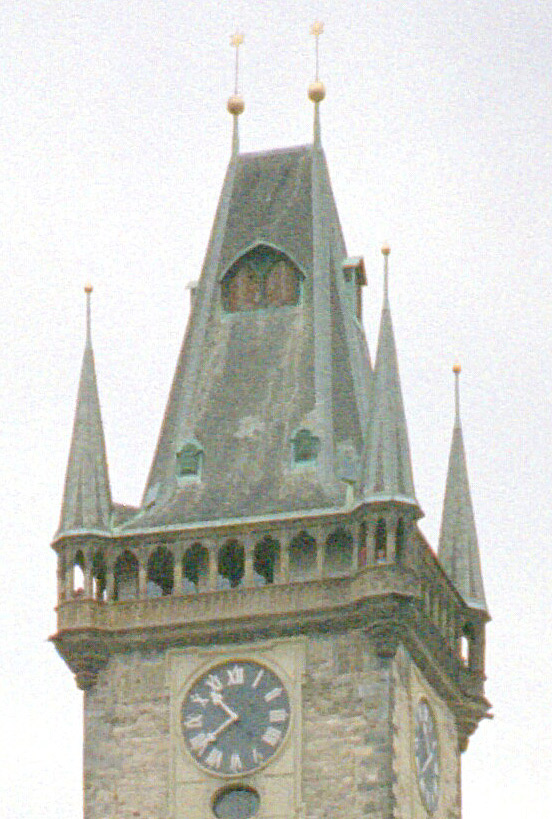
skies, labs, and P&S cameras 1. Photo Labs When I collect my pictures from a photo lab, I am often annoyed with their quality. So are many other amateur photographers. Although labs offer rather a good value for the money I pay them, they cannot do exactly what I need. It is not their fault. It is the reality. Let us have a look at the picture I received from my photo lab this summer (see the left image below). I made this shot in Prague. When I saw the print for the first time, I thought I had been quite unlucky to cut womenÆs legs. The dull sky also spoiled the impression. I threw the picture to the wastebasket and decided to analyze the negative (see the right image below). The impression was different. The entire women's legs could be seen in the negative, and the sky contained more details compared to the print.
As I have already said, I am not going to blame the lab for those defects. It was simply impossible to represent the entire range of densities in a piece of photo paper. An operator had to choose what to show in the resulting image: either the sky or the details in shadows. Moreover, he unintentionally cropped the photograph in such a poor way. Frame gaps on film can be unequal. Because of this, it can be very difficult to provide high quality cropping. In addition, the machines are simply not designed to print the whole frames. Sometimes labs do warn their clients about such things. Now
it is time to say the first useful banality: 2. The Skies Quite often photographers have to decide how to correct grey and dull skies in their pictures. Three options are available:
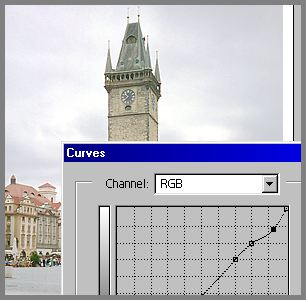
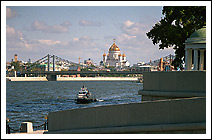
Let us discuss the third option, since the other methods are self-explaining. In my picture of Prague, the sky can be slightly improved by increasing the contrast in the highlights.
The left picture is the original scan produced by a film-scanner, while the right image is a version produced by Photoshop (Curves):
I am not going to say the new image is undoubtedly better. I will not insist that the initial image is a piece of art either. I just used it as a suitable illustration. Other manipulations with the curve in the highlight area can also be very useful. Feel free to make your own experiments. Another method works when there are a few pale clouds in the sky. Mention should be made that I am not the inventor of this method. It can be found in a number of Internet articles. Since
there are no clouds in my picture of Prague, let us experiment with another
my picture that shows 1.
The step-by-step procedure for Photoshop is as follows:
Of course, you can combine both methods to get the best result. It
is time to say the second banality: 3.
P&S Cameras
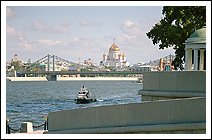
I
made that shot of Prague with Yashica T5, an excellent P&S camera.
It performed perfectly. Moreover, If it had been an SLR camera, I would have removed the lens cap first. Then I would have had to wait until the AF system finished its job. Only after that, I would have been able to shoot. I am afraid, the entire process would have taken a slightly longer period of time, but it would have been long enough to miss the scene. To say more, I assumed the SLR camera was set to a proper operational mode when switched on, that might not be the case either. I
consider this to be good example of a situation when a P&S camera
outperforms an SLR camera. However,
The
third useful banality is:
Thank you for your attention. Have fun! Good Luck!
|
|
|
|
|
® Igor Yefremov, 2002, all rights reserved You
must obtain a written permission from me to use any materials of this
site for any commercial or non-commercial purposes, unless there is an
explicit statement to the contrary. |
|

 2.
2. 3.
3.