|
|
|
|
|
|
|
Understanding
physical meaning of sharpness (Third edition) In my previous articles [1, 2] I have already explained the basic ideas of depth of field and described all the necessary formulas to calculate it. But according to my bitter experience, people do not like to analyze boring mathematical expressions. They prefer to implement simple recommendations instead. However, as a Russian saying goes, simplicity can be worse than larceny. Excessive simplifications often lead to false understanding. This article was written to deflate two mistakes that are quite common nowadays:
Both
ideas originated from Harold Merklinger's book “ This article compares Merklinger's approach with the traditional theory and puts his ideas to the test. All the explanations here put an emphasis on graphs and real photographs instead of mathematical formulas. As a result, I hope, this physical text is easier to understand. And finally, I would like to remind you that the traditional theory is not exact either. It is based on a number of reasonable assumptions, however it still works perfectly most of the time. Any special cases, like micro-photography, for example, are not analyzed here.
Measuring
unsharpness Unfortunately photographers often do not know how to interpret the results of the classical theory. They believe the formulas give them the exact description of the zone of acceptable sharpness. But they often do not understand that in some cases objects became fuzzy very quickly beyond the area of sharpness, while in other cases objects out of focus look only slightly diffused. Let us explain the classical theory of sharpness, analyzing the degree of fuzziness. In article [2] I showed how to derive the formula that describes fuzziness behind the focusing point. Applying that approach to the general situation, we can obtain the universal mathematical expression: Do not worry! I put this tiny formula here just for your reference. You will not find any other pieces of math in this text. :-)
The parameter c can be interpreted as the diameter of the imaginary round photobrush, with which the image on film is created. The smaller this value, the sharper the image. Now let us analyze the graph that corresponds to this simple formula (see Fig.1).
In front of the focusing point, the degree of fuzziness grows sharper. At the halfway point (d0 = d/2) objects are as blurry as at infinity. If the camera-to-object distance is four times shorter than d, the objects are three times unsharper than at infinity. The graph in Fig. 1 demonstrates that the function that describes fuzziness is substantially non-linear. Because of this, it is not easy to derive simple practical formulas from it. However within a limited vicinity of the focusing point it is not that difficult to develop a good approximation. Now let us look at the same graph calculated exactly in accordance with our formula (Fig.2).
Let us call this area the green zone. All approximate theories work perfectly within the boundaries of this area. However, we have to use the initial non-linear model, when our parameters do not comply with the green zone requirement. Harold Merklinger offered another approach to linearization. His object space, where fuzziness varies linearly, can be obtained from the traditional film plane model with the help of a non-linear transformation. But let us be patient. Merklinger's theory wil be discussed a little bit later.
How to calculate depth of field graphically The procedure is very simple. First we have to draw a horizontal line that determines the acceptable circle of confusion c0, i.e. the acceptable size of the elementary dot in our image. Typically, in 35mm photography c0 = 0.03mm, but you may choose any other suitable value as well. For example, if you want to enlarge your negatives significantly, you may want to choose c0 = 0.01mm. Two intersections of such a horizontal line with the fuzziness curve will show us the limits of depth of field (DOF). The exact formulas to calculate DOF can be found in [1]. Now let us consider most important cases. In the table below, the green horizontal line shows the acceptable level of fuzziness c0, while the dash blue line corresponds to the fuzziness of an infinitely distant point c'. The relatively thick green band under each graph shows the DOF area. !!! IMPORTANT NOTE: The graphs in the table serve exlusively to demonstrate the general arrangement of curves and lines. All the distances are meaured in units of d, while fuzziness is measured in units of c'. Thus, the equal distance between the focusing point and the origin of coordinates in cases A to D does not mean the distance between the camera and the object is the same in all those cases.
Again, I have to remind you that all of the above is the classical theory. The description of its results is not traditional, but the results themselves are well-known. Now let us analyze Merklinger's approach.
A different approach—the object field In
his book “
In this article I can give only a brief explanation of Harold Merklinger's approach. If you want to learn more details, please read the original book. It is fair to say that some of Merklinger's conclusions are quite reasonable. But at the same time, it is important to remember that there are many differences between his rules and traditional recommendations. Of course, Merklinger's approach is basically correct. However, the problem is that his theory perfectly works when the resolution is discussed, but it is not suitable for the purposes of sharpness. One may also ask a natural question: Is it possible to compare two so diferent approaches? The answer is: it depends. Of course, the two theories describe different things, i.e. the object field and the film plane. But at the same time they both deal with sharpness. When I compare them, I try to find out which theory better matches the intuitively obvious concept of sharpness. Thus, a person, who is far from physics and math, typically faces the following contradictions:
Merklinger wrote that in spite of many differences, both methods can be used in practice. This sounds quite strange, because the recommendations of the two theories critically diverge. Merklinger wanted to clarify the subject matter, but ironically many photographers got perplexed. So the question is, which method works best? Which theory treats sharpness in a reasonable way? There is only one way to resolve this dispute. I mean experiments.
Sharpness and the focal length Does sharpness depend on the focal length at a constant magnification? To answer this question, I had to take several photographs with lenses of different focal lengths. During the experiment, I changed d in proportion to f to maintain magnification constant (f/d = const).
Before discussing the results of the experiments, let us recall what the two theories predict for our conditions. According to Merklinger�s theory, the degree of unsharpness must be the same for all focal lengths. Or, at least, resolution of details must be the same. The
traditional approach treats the situation as follows. If we start with
a lens with a relatively short focal length, our parameters will be beyond
the limits of the green zone (Fig. 2). In that case, the front DOF will
be smaller than the rear DOF. When focal length increases, the front area
of sharpness will grow, while the rear area of sharpness will shrink.
This process will continue, until the front DOF almost equals the rear
DOF. Then the parameters will be within the green zone, and DOF will stop
reacting to changes in focal length. Now let us return to the results of my experiments.
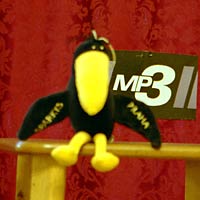
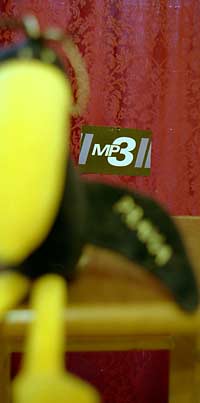
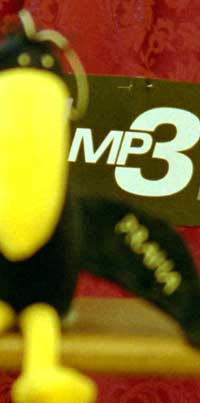
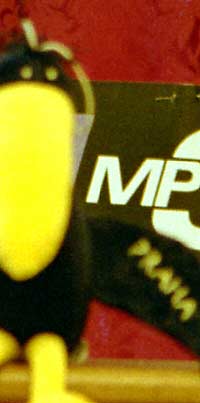
When producing the photos shown in Fig. 5, Fig. 6 and Fig. 7, I equally enlarged all the negatives. The constant magnification means the size of the plate, which was attached to the curtain, must be the same in all photographs. The size of the toucan should vary, of course. The results are self-explanatory. In the first photo the toucan�s eyes are vague, while in the last photo they are almost sharp. The stool in Fig. 7 is undoubtedly sharper than its peer in Fig. 6. Moreover, it is easy to notice that an increase in focal length results in better resolution of details. The letters on the toucan�s wings perfectly illustrate this idea. Advocates of Merklinger�s theory may not be happy with such illustrations because the image of the toucan varies in size. To make things clear, I also prepared another version of those pictures (Fig. 8, Fig. 9 and Fig. 10). In this case, the enlargement of the negatives differs from one image to another, and the size of the toucan is maintained constant.
Again, it can be clearly seen that both sharpness and resolution do depend on the focal length when magnification is kept constant. The experiment showed that, when we look at pictures, the traditional theory outperforms Merklinger�s rules. The latter approach is only a special case and should be used with care. For example, you must never use Merklinger�s recommendations for the objects that are located closer to the camera than half the hyperfocal distance.
Now it is time to check Merklinger�s recommendations for the area behind the point of exact focus.
Focusing at infinity vs. focusing at the hyperfocal distance Harold Merklinger was very unhappy with the traditional recommendation to focus the lens at the hyperfocal distance to obtain the largest DOF. No wonder. His disk-of-confusion in the object field unlimitedly grows behind the object in focus (see the diverging blue dash lines in Fig. 3). Due to this fact, resolution diminishes as the distance from the camera increases. Merklinger claims this fact is critical for the pictures of distant objects.
But a number of questions still remain unanswered. Does it make any sense? Is the traditional recommendation to focus the lens at the hyperfocal distance incorrect? If so, how many new details will we see, if we focus the lens at infinity? Will the distant objects look significantly sharper? First of all, let us recall what the traditional theory recommends.
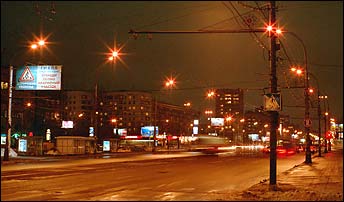
The traditional recommendation to focus the lens at the hyperfocal distance assumes that infinitely distant points will be rendered sharp enough, because fuzziness of remote objects cannot exceed c' (Fig.12). Again, a few experiments can help us to understand the subject matter correctly. First of all, I would like to demonstrate you that the divergence of the blue dash lines in Fig. 3 is not that critical. Moreover, it is quite natural, and it does not lead to unsharpness.
Now let us see what happens if the lens in focused on a close object.
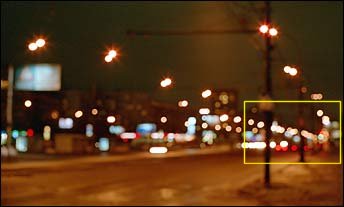
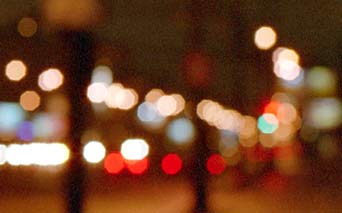
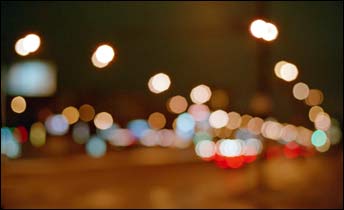
The photo in Fig. 14 corresponds to the case when the lens was focused at 1.5 m. Under such conditions, the lamps were transformed into circles. The enlargement of the fragment in the yellow frame is shown in Fig. 15. The traditional theory proved to be true again. The green spot represent the green traffic light that was 100 m away from the camera. It is absolutely the same size as the neighboring faint circles from the lamps that were over 300 m away.
But our judgments must be fair to Merklinger. He described the situation in terms of resolution, while the traditional approach deals with sharpness of contours. The question is — Is it correct to substitute sharpness with resolution? It must be admitted that the larger the distance from the camera, the more details are captured by a circle of confusion of a constant diameter. In this sense, Merklinger is right. Resolution for distant objects does decrease. But it is absolutely natural. It is more than likely that a person with perfect eyesight will not recognize a very familiar face from the distance of 100 m. Nobody would anticipate the opposite outcome. Even if our eyes are focused at infinity, we cannot expect to see the same number of details on remote objects as we see on close objects. Sharpness of contours is a different thing. When we focus our eyes at infinity, we will not be able to distinguish small details at large distances. But contours of large objects will be sharp and clear. I mean that it is better to describe sharpness in terms of an imaginary photobrush that works in the image field than in terms of resolution in the object space. Let us have a look at Fig. 8 again. Does it matter that we can distinguish the toucan�s eyes in the picture? The eyes remain blurry, and that is the point. When a painter creates a picture, he may not show a lot of details. The picture will look sharp, if the contours are distinct. And vice versa, if the contours are blurry, the picture is considered to be unsharp, no matter how many details can be distinguished. If you admit my arguments, then you should also admit that focusing at the hyperfocal distance is quite reasonable.
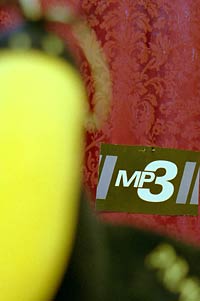
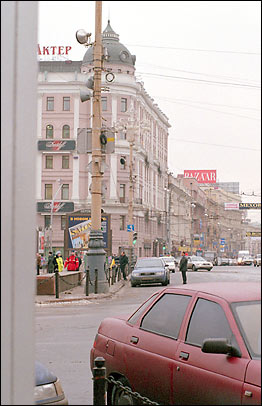
First, let us see how remote objects are rendered (Fig. 18 and Fig. 19) at the two focusing distances. Since the BAZAAR board was 10 times farther from the camera compared to the hyperfocal distance, it could be considered to be infinitely distant.
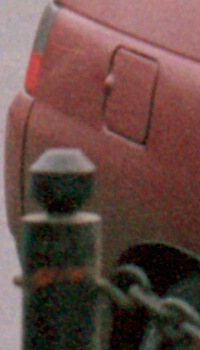
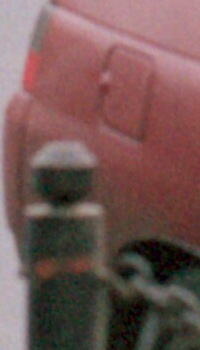
The advantages of focusing at infinity did not prove to be obvious. When preparing the illustrations, I scanned the negatives @2820 dpi, which gives 3 pixels per the diameter of the circle of confusion. Had I scanned the negatives @4000 dpi, the differences would have been more noticeable. Nevertheless, I believe the gains would not have been considerably evident. If we are not going to enlarge a 2 x 3 mm fragment of a negative, the advantages of focusing at infinity are negligibly small. Now let us see at the foreground (Fig. 20 and Fig. 21).
The rear part of the car was approximately 6 m away from the camera. The degree of enlargement is the same for all fragments (Fig. 18 to Fig. 21). It is quite obvious that the image in Fig. 21 is smeared. Our ability to resolve all the details does not save that picture. It remains to be quite blurry. I believe, in this case it is better to focus the lens at the hyperfocal distance. It will give us the largest DOF in our picture. Focusing at infinity should be preferred to focusing at the hyperfocal distance, only if all of the following conditions are observed:
If at least one of the above conditions is not observed, it is worth focusing the lens at the hyperfocal distance.
Conclusion The traditional theory works perfectly in most practical cases. Moreover, it is not that difficult at all to be substituted with an alternative that pretends to be its peer. Harold Merklinger�s approach can also be used in practice. However, it is a very special and limited method. For the purposes of resolution it works perfectly. But it may fail when it deals with sharpness. Generally speaking, depth of field is determined by magnification, f-number, and the focal length. Only if the focusing distance is significantly smaller than the hyperfocal distance, depth of field does not depend on the focal length at a constant degree of magnification. The largest depth of field can be obtained if we focus the lens at the hyperfocal distance. It should be kept in mind that when we focus lenses at infinity, we always make close objects fuzzier. And,
of course, a photographer's experience also does matter.
|
|
|
|
|
� Igor Yefremov, 2003, all rights reserved You
must obtain a written permission from me to use any materials of this
site for any commercial or non-commercial purposes, unless there is an
explicit statement to the contrary. |
|